STEP 1 : Access Your Account
Log in to your Do Your Order restaurant account.

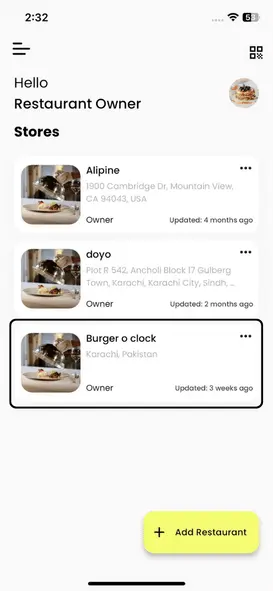
STEP 2 : Select the Restaurant
Choose the specific restaurant for which you want to add a menu item if you manage multiple establishments.

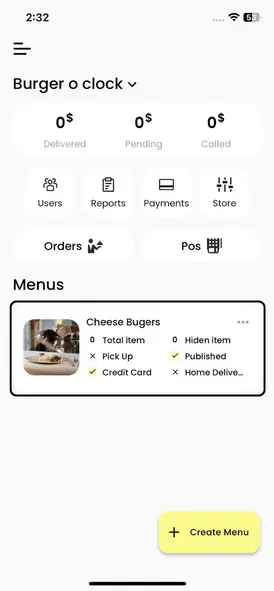
STEP 3 : Choose the Menu
Navigate to the menu you wish to edit within the selected restaurant.

STEP 4 : Add a New Item
Locate the prominent plus (+) icon at the bottom of the screen, and click on it to create a new menu item.
STEP 5 : Enter Product Details
Introducing our innovative product, designed to revolutionize your daily life. With cutting-edge features and unmatched reliability, this is the solution you've been waiting for. Experience the future today
Product Title
Provide a clear and concise name for the menu item
Description (Optional)
Describe the item, highlighting its key ingredients or characteristics.
Price
Specify the menu item's price.
VAT
If applicable, select the appropriate VAT rate.
Allergen Flag
If the item contains allergens, mark them appropriately to inform customers.
Product Formats
If your menu item comes in different sizes or formats (e.g., Small or Big), indicate these options.
Add Product Extras
If your menu item allows for extras (e.g., extra cheese, spiciness level), include these variations.
Save Your Changes
Once you've entered all the necessary details, click the "Save" button to add the new menu item.
STEP 6 : Duplicate for Efficiency
To save time when adding similar menu items, consider duplicating an existing product and editing the duplicated item to suit your needs.
STEP 7 : Manage Products
Remember that you can always manage your menu items. You have the option to delete, edit, or unpublish a product, ensuring that it won't be displayed to your customers.


