
Step-by-Step Guide: Utilizing the Order Management and Processing Platform for Restaurant Staff
This in-depth guide is crafted for waiters, servers, managers, administrators, and business owners to elevate operational efficiency in their restaurants using our specialized app. Follow these steps, accompanied by illustrative screenshots, to proficiently manage your order processing and service delivery.
This in-depth guide is crafted for waiters, servers, managers, administrators, and business owners to elevate operational efficiency in their restaurants using our specialized app. Follow these steps, accompanied by illustrative screenshots, to proficiently manage your order processing and service delivery. Ensure your restaurant setup is complete, with a fully populated menu. For details on the different roles and permissions, refer to our comprehensive role definition guide linked here.
STAFF MEMBERS NEED TO DOWNLOAD THE APP ON A PHONE OR TABLET TO WORK
Initial Setup and App Installation
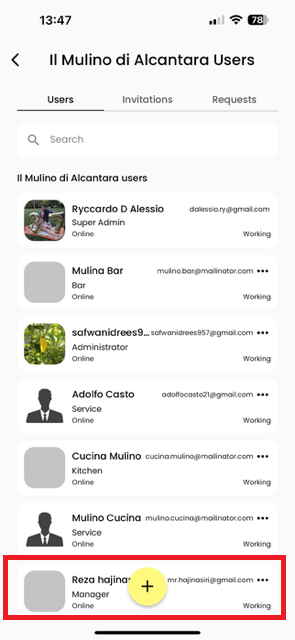
Step 1: Assigning to the Service Department
- Go to "Users" on your restaurant's home screen and tap the plus icon to add a new user.
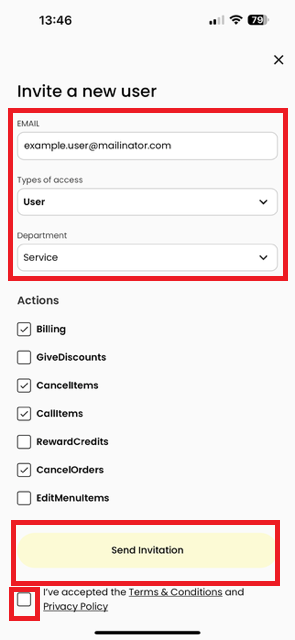
- Enter the employee’s email, select "User" for access type, and assign them to the "Service" department.
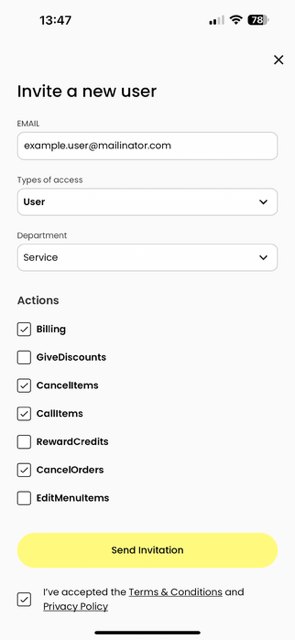
- Customize rights such as billing, offering discounts, canceling items, and editing menu items.
- Send the invitation and monitor the verification of their email.

NB1: Ensure that each role is assigned appropriate permissions to prevent unauthorized access to sensitive functions.
NB2: Business owner, managers and administrators have full rights of that restaurant
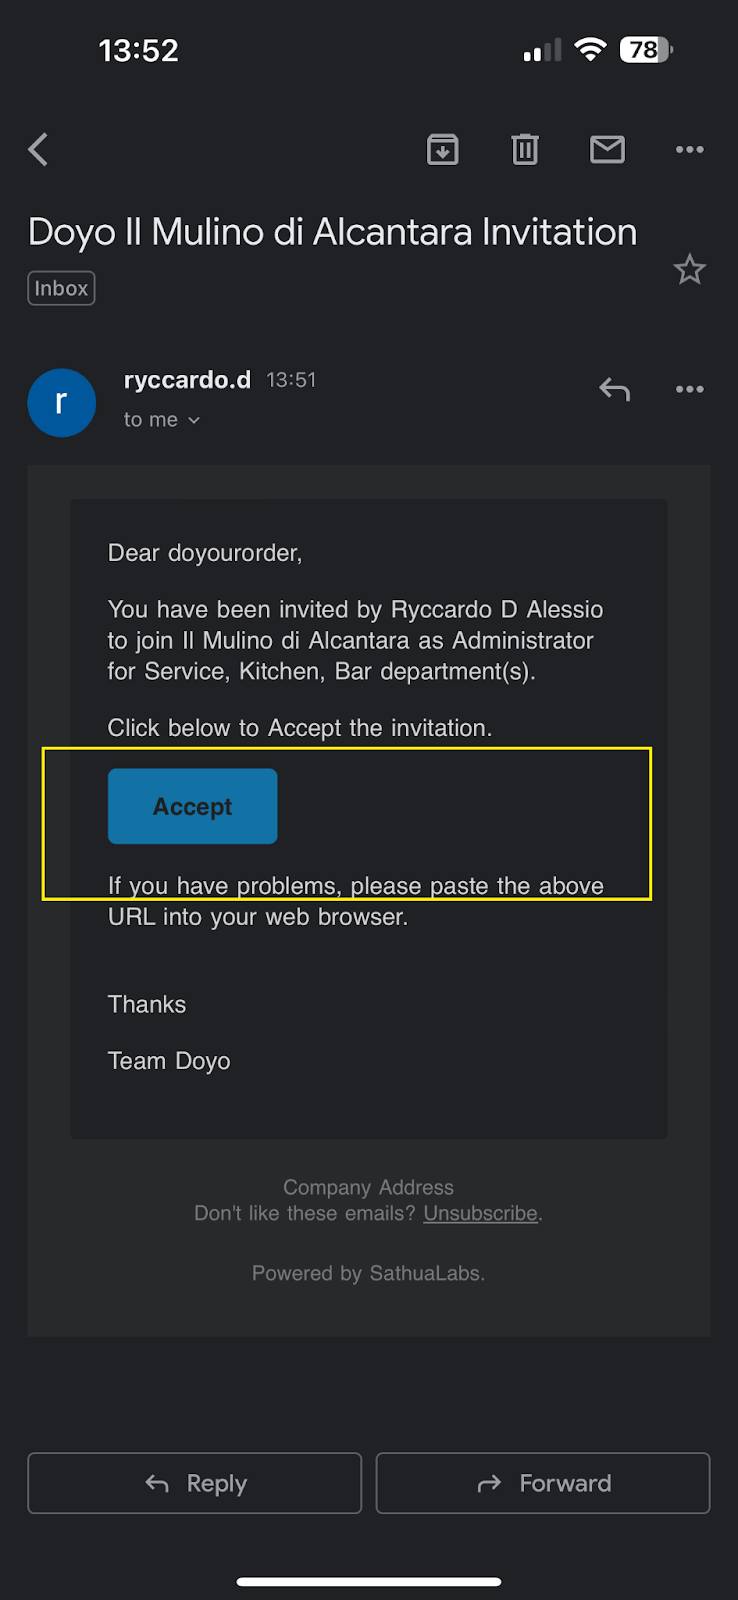
Step 2: User Account Verification and Onboarding
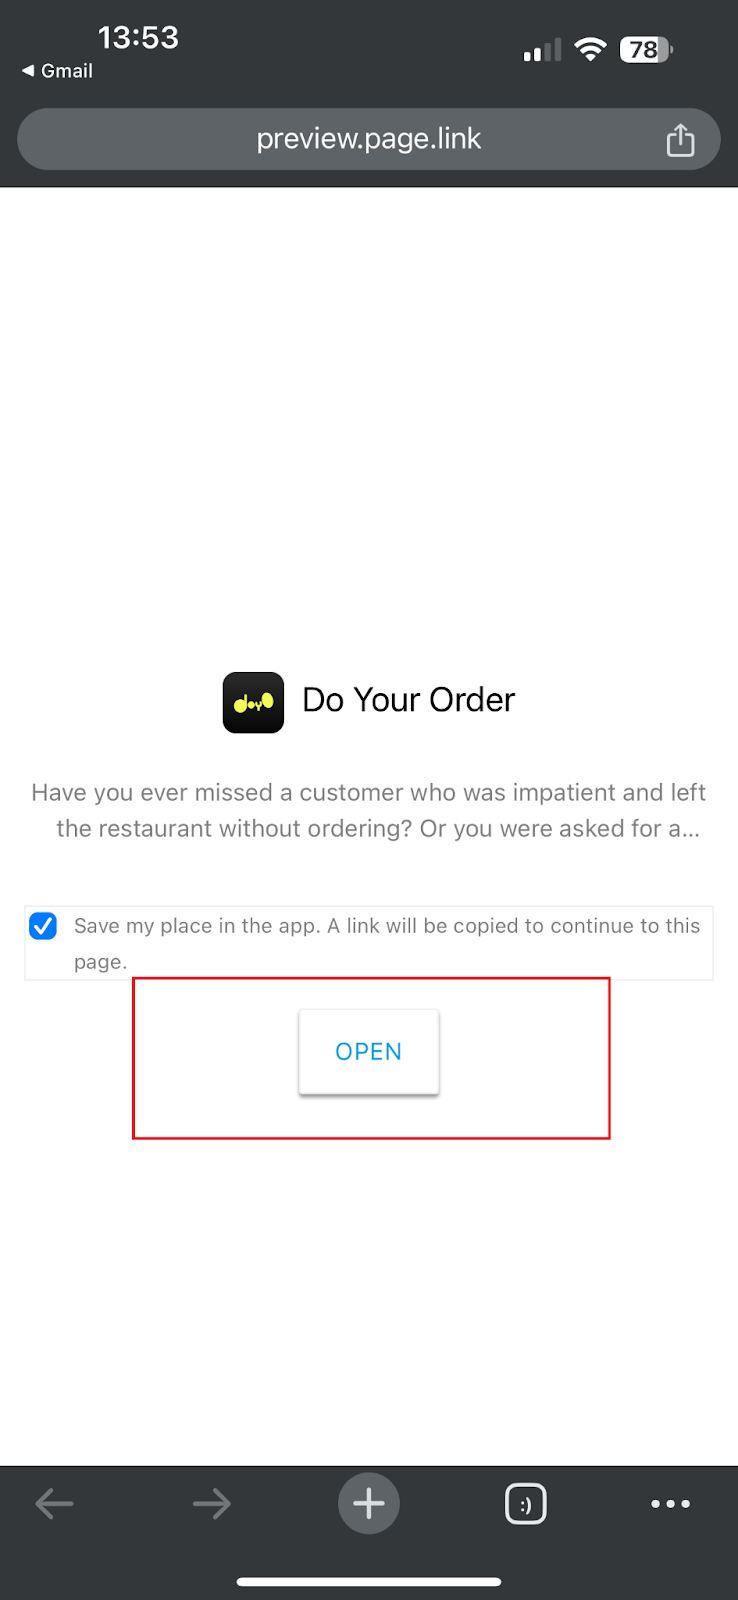
- The employee will receive an email with a verification link.
- They should click the link to be directed to download the app and register using their name and surname or a more secure method like Google, Apple, or Facebook sign-in.
- Once registered, the employee transitions from the invitation tab to full user status, ready for shift and schedule assignments.
NB: Prompt registration helps streamline user integration and operational readiness.
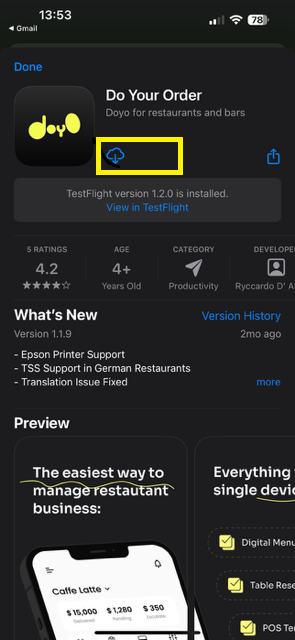
Step 3: App Installation and Setup
- All service staff must install the app to manage orders efficiently.
- Connect the app to the same WiFi network as the restaurant's printer systems.
Order Handling and Menu Navigation
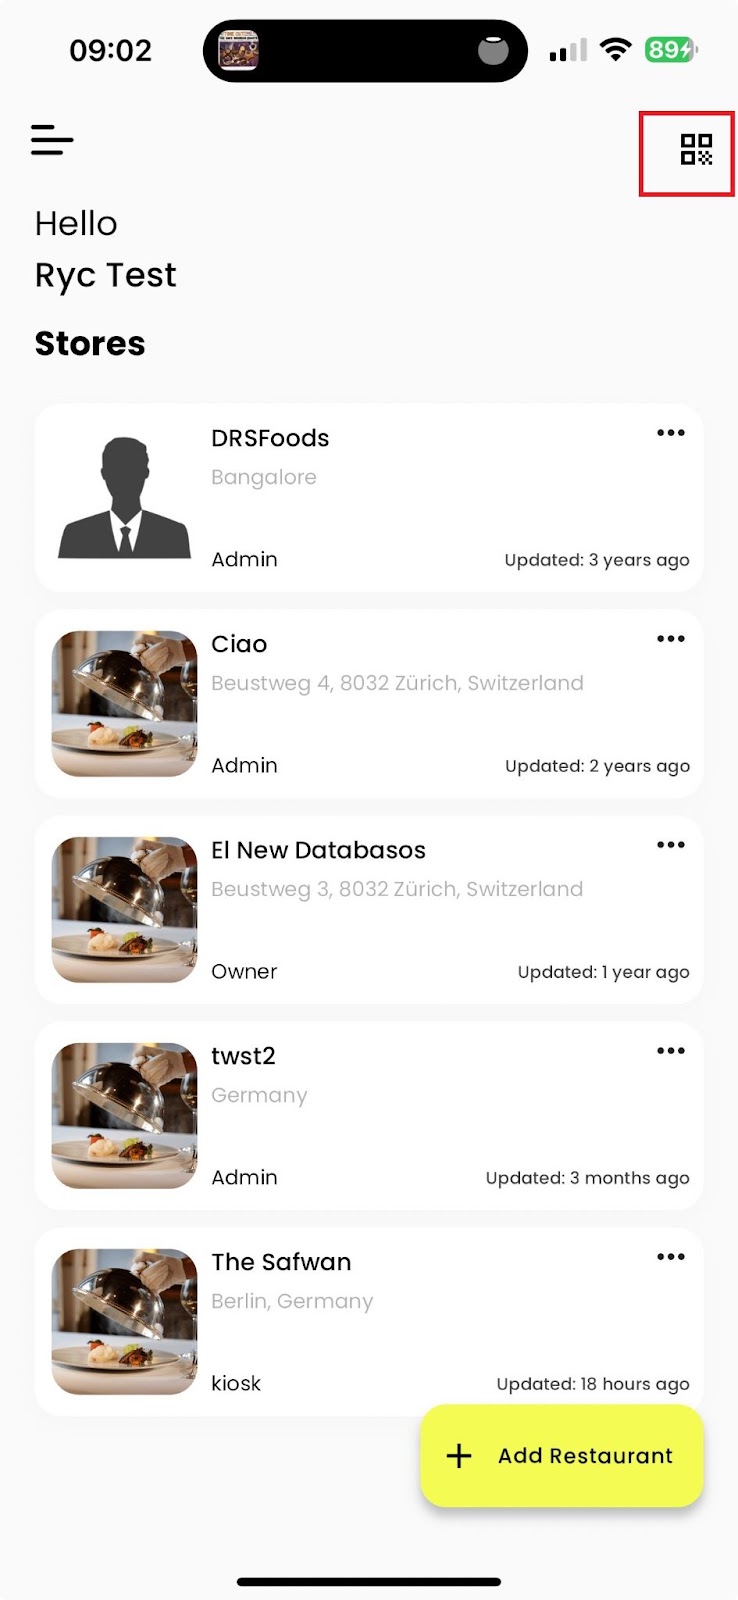
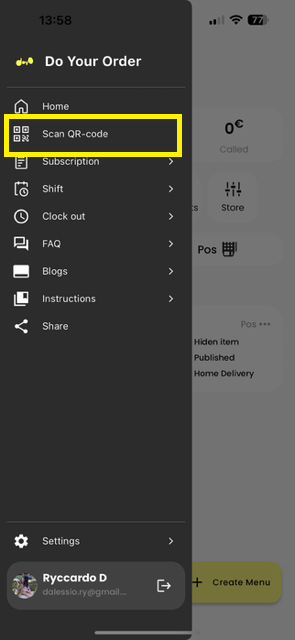
Step 4: Scanning QR Codes FOR STAFF (YOU HAVE 3 OPTIONS)
- Initiate orders by scanning QR codes using the app’s designated "Scan QR-Code" button or directly from the restaurant’s home screen.
- Avoid using the phone’s standard camera to prevent order misinterpretations. As a service personal always can the qr code via the app

NB: In case it is not done yet. You need to print and locate the numbered QR codes on each of the table as detailed in this link
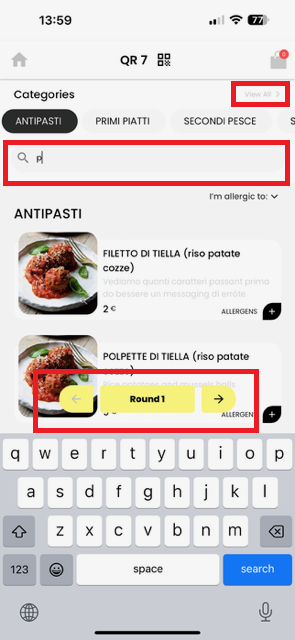
Step 5: Navigating the Menu
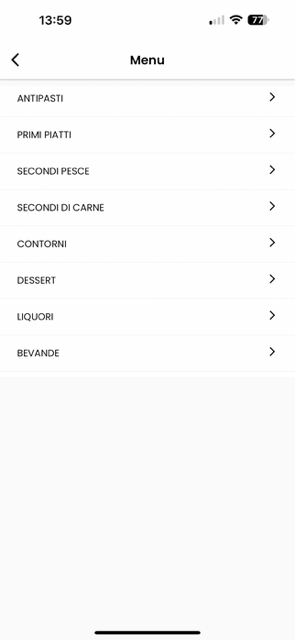
- Use the "View All" button to display all product categories simultaneously.
- Locate items quickly using the search box and assign them to specific service rounds as needed.
Step 6: Placing Orders
- Select items and use the cart icon to add specific customer instructions or dietary preferences.
- Submit the order to the kitchen for preparation.
NB: Do not use the "Call" function if self-ordering is enabled to ensure equitable service. Orders which are “called” will be put ahead of the KDS screen.
Service and Table Management
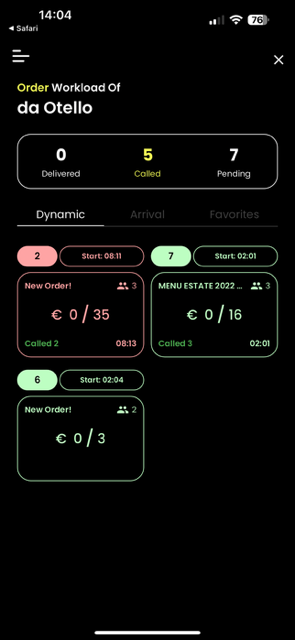
Step 7: Monitoring Table Service
- The waiter screen shows tables color-coded by wait time: green, yellow, and red, with red indicating priority.
- Monitor all self-ordered items for any necessary follow-ups or modifications.You will noticed they are client orders because the are flashing on the top right corner of the table

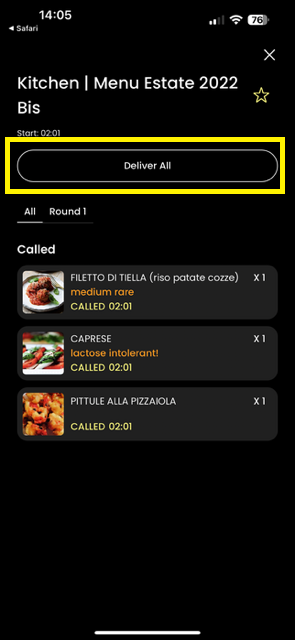
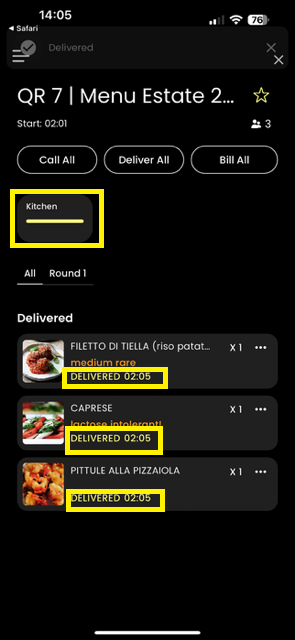
Step 8: Delivering Orders
- Respond to push notifications for ready orders, deliver to tables, and mark as delivered in the app for accurate tracking.
Billing Process
Step 9: Managing Prepaid Self-Ordered Items
- Items prepaid and ordered by clients are flagged as "PAID" and excluded from the final bill.
- Access transaction records in the transaction report for these items.
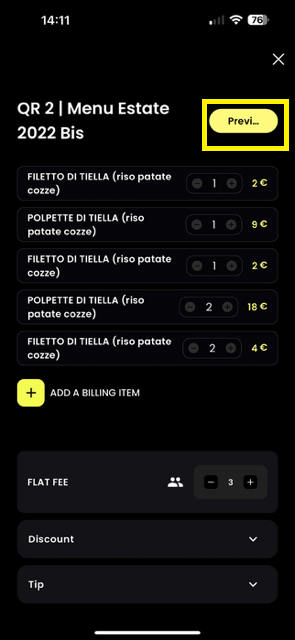
Step 10: Initiating the Billing Process
- Go to Orders, Service and click on the table you want to bill: Click the button “Bill All”
- In case you have pending items that you forgot to flag as delivered, deliver them as well by answering yes to the pop up question
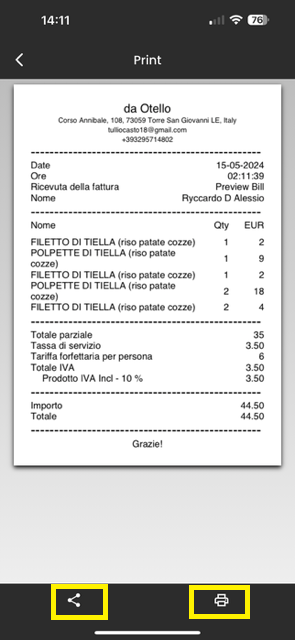
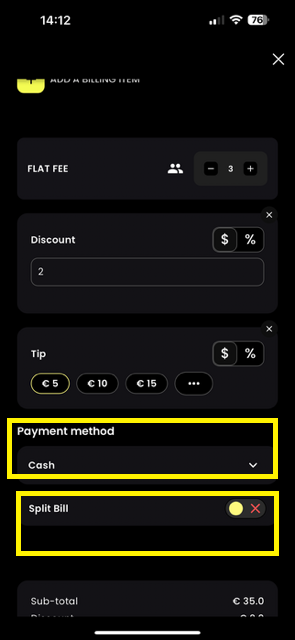
- Preview the bill for guest review, ensuring it reflects only unpaid items.
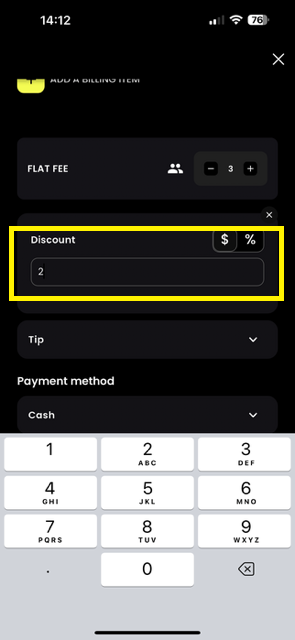
- Discuss payment preferences and manage bill splitting or tipping as requested.
- Choose payment method
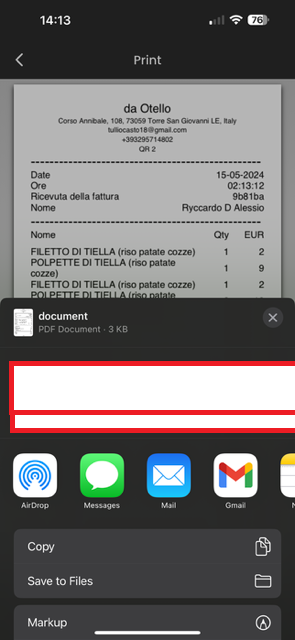
- Click Bill and Print
- Print the receipts or share it via whatsapp, e mail or any other digital way


Step 11: Finalizing the Payment
- Use a credit card terminal like Sum Up for automatic payment transmission, accommodating split bills.
By adhering to these steps and utilizing the provided screenshots for guidance, restaurant staff can effectively manage orders and ensure efficient operations, leveraging technology to enhance customer satisfaction and streamline service rounds.
- Initial Setup and App Installation
- Assigning to the Service Department
- User Account Verification and Onboarding
- App Installation and Setup
- Order Handling and Menu Navigation
- Scanning QR Codes FOR STAFF (YOU HAVE 3 OPTIONS)
- Navigating the Menu
- Placing Orders
- Service and Table Management
- Monitoring Table Service
- Delivering Orders
- Billing Process
- Managing Prepaid Self-Ordered Items
- Initiating the Billing Process
- Finalizing the Payment
- Ready to get started?